I write a lot of database driven code that provides me with ample means to store data in a data table. These programs often involve me creating a class file around a specific data structure using properties to get and set values for the structure, intantiating an instance of these classes as objects and then writing them to the database.
I'm going to go through a simple example here of just such an object and then I'm going to create a class that defines a collection of these objects and write that collection to a binary file for later use. To begin, let's create a project in Visual Studio 2005 and define a form to allow users to enter, save and retrieve saved names.
I've included a sample C# project with this post and it is available by request.
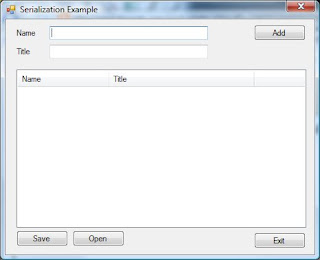
Here's the form that I created:
 Pretty basic stuff... I've included two text boxes to allow users to enter a name and title for a person. I've also included a ListView control to contain all of the names in the list of persons, along with buttons to add names to the list, save the list, open a saved list and exit the application. The ListView control contains two columns (name and title) and its View property is set to Details.
Next, I defined a class file to represent each person as an object with properties defined for both name and title:
using System;Notice the [Serializable] attribute at the start of the class which allows this class to be serialized. When you do this, the class is no longer able to be inherited, so design your projects with this in mind.
using System.Collections.Generic;
using System.Text;
namespace
SerializationExample1
{
[Serializable]
class person
{
private string name;
private
string title;
public string Name
{
get
{
return name;
}
set
{
name = value;
}
}
public
string Title
{
get
{
return title;
}
set
{
title = value;
}
}
}
}
Next, we add some basic code to the form class to handle the addition of names to the list. First, I create a generic list of type person called People. This list will maintain all of the instances of the person class and will be used to populate the ListView control:
private List<person> People = new List<person>();
Next, I create a code block for the Add button's click event and create the code to add a new instance of the person class to the list:
private void buttonAdd_Click(object sender, EventArgs e)
{
person newPerson = new person();
newPerson.Name = textName.Text;
newPerson.Title = textTitle.Text;
People.Add(newPerson);
// create a new listview item and add it to the control:
ListViewItem lvi = new ListViewItem(newPerson.Name);
lvi.SubItems.Add(newPerson.Title);
listViewNames.Items.Add(lvi);
}
Now, once a few names have been added, I want to be able to save the list of names and titles to a binary file. To do this, I define a new code block for the Save button's click event and add my serialization code:
using System.IO;
using System.Runtime.Serialization;
using System.Runtime.Serialization.Formatters.Binary;
...
private void buttonSave_Click(object sender, EventArgs e)
{
string filename = "c:\\serializedList.ser";
Stream s = new FileStream(filename, FileMode.Create, FileAccess.Write, FileShare.None);
BinaryFormatter b = new BinaryFormatter();
b.Serialize(s, People);
s.Close();
}
Notice the using statements at the beginning. These are required to perform serialization tasks.
This code block will create a binary file called 'serializedList.ser' to the root directory of drive c:\\. If you want to get fancy with this you can create a SaveFileDialog box and prompt for the name and location of the file. You could also create a bin directory in the application folder to house these files. This file name and location was chosen for the sake of simplicity.
So, next we need to define a code block to respond to the Open button's click event which will load the saved data and populate the ListView control with the data contained in the binary file:
private void buttonOpen_Click(object sender, EventArgs e)
{
Stream s = null;
string filename = "c:\\serializedList.ser";
List<person> LoadedPeople = null;
bool loaded = false;
try
{
IFormatter formatter = new BinaryFormatter();
s = new FileStream(filename, FileMode.Open, FileAccess.Read, FileShare.None);
LoadedPeople = (List<person>)formatter.Deserialize(s);
loaded = true;
}
catch (System.Exception ex)
{
MessageBox.Show(ex.Message);
}
finally
{
s.Close();
}
if (loaded)
{
listViewNames.Items.Clear();
for (int i = 0; i < color="#66cccc">person newPerson = LoadedPeople[i];
ListViewItem lvi = new ListViewItem(newPerson.Name);
lvi.SubItems.Add(newPerson.Title);
listViewNames.Items.Add(lvi);
}
}
}
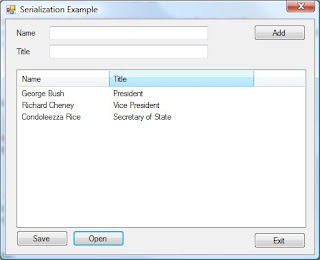
Here is a look at a populated form:


 The code used to generate the
 From here, I see this being used to document labels that cannot be scanned, possibly damaged goods reporting, etc.